How To Start A Beauty Business Blog On Bluehost

Last Updated: January - 2022
Today, you will learn how to quickly and easily start your beauty business blog and install it. Blogging has made it easy and fun to write what I have learned in this business, and to hopefully share it with you. There seems to be so much to learn and so little time that it can be frustrating just trying to get started. Plus you can use it to get new clients and share what you know. Below, I have included discounted pricing that I personally negotiated with Bluehost so that all of you can get started today and for cheap. You also will receive a blog domain through my link too. Act quick though because I'm not sure how long this discount will last while the prices are this low!
Disclosure: I am an affiliate for Bluehost, and will receive a commission if you sign up through my referral link. This is at no cost to you, and you get great pricing and a free domain name thru my link.
Click here to start a beauty business blog on wordpress, then use the tutorial below for the easy directions to install and get started.
If you're looking to start a WordPress blog for cheap, then choosing Bluehost to host your blog could be the answer that your looking for. Bluehost is an awesome web host and it is the first one that I started using back in the day. I now have several blogs with them, and I can tell you from my experience that I love them. Their customer service is super awesome, and I am so happy that I chose Bluehost.
Today, you will learn all about how to easily create a Wordpress blog of your own. Blogging has allowed me to have a career, connect with customers and other beauty business professionals, all by doing something that I love and am passionate about...learning and teaching
Plus, for only a couple of dollars a month you can start your own beauty business Wordpress blog!
Like I said, Included, is discounted pricing that I have personally negotiated for you, with Bluehost, so that you can start a blog for cheap. In addition to this awesome offer, you'll get a Free blog domain through my link too. Act quickly though, because I don't know how long these low prices will last!
Bluehost is one of the top web hosting companies in 2022 and you can get started today with them for as low as $3.95 a month (this low price is through my link only)! Plus, if you sign up using my link, then you will get your domain name for FREE if you purchase a 12 month package plan thru Bluehost. It really is an affordable way to start your own beauty blogging business and can save you a lot of money by signing up for a 12 month plan. The best plan value plan is a 36 month plan, and with that, your rate will be even less.
This is your beauty business and if you are really serious about it, then you will want to start your Wordpress blog on Bluehost today.
If you are thinking about using one of the free blogging sites such as blogger, just to save a few bucks, a word of caution.....DONT! On Blogger, you might think you own your blog since you “have registered” your own domain name, but you really don't. Blogger can delete your blog whenever they want, and it has happened to others. All they have to do is click a button and everything goes bye bye!?” In the end it will cost you money and so much more of your time. Time is money, and wouldn't you rather be making money then trying to figure everything out without awesome customer support? I know I don't.
If you are interested in making money off of your beauty blog, freelancing or tuning it into a business then having a Professional web hosting service with Bluehost is a must.
There are alot of reasons why, but here are the main ones:
- Easy to use- ANYONE can create a WordPress beauty blog easily with my tutorial below. Bluehost makes it so easy to create a WordPress blog.
- Awesome technical support- I am not a techie AT ALL. So this is very important to those of you who don't want to get caught up with all of the techno stuff.
- Super affordable with cheap web hosting- You can have a blog of your own, for real, and the only real expense you need to pay is the cheap blog hosting which starts at just $3.95 as a special promotion thru my link only.
- FREE blog domain- That's right! You get your own free domain.
- FREE WordPress- through Bluehost is FREE
- Offers a Guarantee- Bluehost also offers a guarantee just in case you change your mind and this business is not for you. (Hey, it happens, sometimes people change their mind and get out of the beauty business and into another occupation. Even then, you might also want a Bluehost website for your new occupation.
- You will be self-hosted- Meaning that your blog is YOURS! This is important if you plan on monetizing it. If you want to monetize your blog, as I discussed previously, then you will want to be self-hosted.
- You will appear much more professional- to your audience, companies who you might want to sell advertising to, and others if you are self-hosted on Bluehost rather than being on blogger, or other free blogging platforms.
Something To Look Forward To Each Day-
- Hosting your own advertisements, affiliate links to your makeup products, direct advertising, etc. with a Wordpress blog that you self host with such as Bluehost.
- "It doesn't cost, it saves."
- It’s just so much harder to make money using a free blog, such as blogger or other free blogging platforms.
- If you plan on selling advertising on your blog, having your own self hosted blog is a lot more professional then a free one, such as blogger, or other free blogging platforms. Advertisers shy away from free blog sites, which can make it more difficult to make money from selling space on your site. So that's another thumbs up for using a Bluehost.
- You can also use a more intense hosting site, such as SBI (Sitesell). Bluehost and Site Sell are the perfect team! It has all the bells and whistles you could ask for. It does cost a bit more to get started, and it has a longer learning curve. But well worth the price. It’s your choice, but those are the two best options today to start your blog if you want maximum success.
So if you are ready to get started with a Blog of your own, keep reading. And remember, as Your Beauty Business Coach I am here to help. Again, if for any reason you get stuck, after you have signed up with Bluehost, and need uber instructions, shoot me an email, and I will send you bigger instructions. You can also contact the super team at Bluehost. They are truly an awesome group of professionals ready to help you. This is their business! They are just a phone call away and are ready to help.
First, you will need to go to Bluehost to sign up and get started..
Click here to start a WordPress Blog on Bluehost
Once you have joined Bluehost, come back here to use the BASIC TRAINING Tutorial below for the easy directions...
BASIC TRAINING:
How To Start a Wordpress Blog on Bluehost

1.Register Your Domain Name:
You can Click here to start a blog on WordPress Blog on Bluehost
After you have created your account with Bluehost, you will want to choose a domain name. Spend a little extra time to think about what you want your domain name to be. I know this can be a little tough, but I would give some serious thought to this.
Choosing a Domain Name – Be sure, however, to choose a strong Domain name (either your own name, a catchy business name you want to brand, or an easy-to-pronounce-and-remember keyword and/or location based name; for example: “chicagosalsada.com”). (Yes, “ccc.com” would be shorter, catchier and easier to brand and remember – but that will only work if you want people who already know that acronym to find you.)
You can get your domain directly through Bluehost making the whole process super easy. If you do this, you can get a FREE domain for the first year as long as you buy 12 months worth of Bluehost web hosting. It’s worth it to sign up for a minimum 12 months of hosting, because you will be saving alot of money this way.
You also get cheaper monthly pricing when you buy at least 12 months of hosting, so getting the free domain just makes it even better. If you decide to get the free domain, just continue to the next step to buy your hosting and get the free domain all in one step.
It’s also not a good idea to create a free blog at WordPress.com if you’re planning to monetize your blog content in any way (displaying ads, sending people to your sales page, including affiliate links and the like) – or even use it for business. For one thing, this is against WordPress.com’s rules.
If you disregard these rules, you are quite likely to wake up one morning and find out your blog has disappeared off the face of the digital planet, without a word of explanation. And all your hard work has gone up in smoke for some violation that will never get explained.
- To get the cheapest price, choose the “Basic” plan- It’s only $3.95 per month through my link (due up front in full) if you sign up for 36 months.
- You only need the Basic plan to get started quickly and easily- so hold off on the Plu and Business package for now. You don't need it, and they are more expensive. It’s easy to upgrade when your ready.
- Think about getting the Domain Privacy Protection- at $0.99 per month it’s worth it. I always hide my account with WHOIS, from the peering eyes of the public. It's none of their business who owns the domain names. Also, your contact information is safe.
- Don't sign up for all of the other extras that Bluehost sells- You don't need those either right now. So uncheck everything else. You can always add on as you need more.
- And don't forget, if you sign up using my link- then you will get your domain for free if you purchase a 12 month or longer blog hosting plan.
I really want to emphasize why you should purchase at least a 12 month minimum, hosting plan. You are running your own business, so month-to-month isn't going to do you any good. I hope you plan on running your business for more than one year. I highly recommend signing up for a minimum of 12 months for many reasons. By signing up for a minimum of 12 months, you will receive a free domain name, cheaper pricing, no expired website after each month. For example, if you don't renew your plan or if your card expires, then your website is down and you risk losing business (visitors/traffic) when you pay on a month-to-month basis. Remember, this is YOUR business, not a hobby anymore. Take it seriously and it will be good to you. The longer you sign up for, the less you pay.
Bluehost offers a guarantee if you decide that you want a refund. So don't worry about signing up for a 12 month minimum hosting plan. Chances are you won't cancel and will continue on your beauty blog journey. You get a full refund within 30 days and then prorated after that. So whatever you don’t use, you’ll get back. There’s really no risk!
Ready to create your blog? Follow these steps to buy hosting for your blog
1) Select Your Plan - The “Basic” Package will probably do the job to get started

2) Choose Your Domain Name

3) Add Your Account Information

4) Choose Your Package

5) Add Your Payment Information

6) Choose a Password for Your Account


Install Wordpress-
Bluehost has recently come out with a new sign-up flow called Bluerock where our customers have WordPress automatically installed at sign-up without having to go in and manually install themselves. It allows for a much more user-friendly experience
This step isn’t hard at all. Bluehost makes it very easy to create a WordPress blog and it is FREE. And they have an awesome support team.
2. Pick Your Theme:

3. Your All Done Installing:

4 Welcome To Bluehost - Start Building:


HELPFUL TIPS:
Note: If you buy your Domain name from Bluehost ( which I recommend) You can skip this section and go straight to Installing wordpress.
1. Connect your domain and your hosting.
If
you bought your domain from Go Daddy, then you will need to change your
domain to your hosting account. Go Daddy has a full support page for
setting nameservers for your domain names.
Below is a quick overview on how to do this:
If your domain name is registered with godaddy but hosted through another company, such as Bluehost (or on a server you control), you'll need to change its nameservers. What that is, we don't know! You'll have to talk to your host or admin to find out what your nameservers should be.
Once you have those nameservers, you can set them on your domain name using these instructions.
How to modify your DNS Nameservers when you are using Go Daddy for your domain and Bluehost for your hosting:
- Log into the GoDaddy.com Account Manager.
- Select Manage Domains from the Domain Names drop-down menu or the Manage Your Account list.
- 3.Select the domain name you wish to modify using the check boxes and then click Set Name Servers.
- Enter your updated name server information in the spaces provided under the blue Name Servers heading on the right side of your page and click Save Changes at the bottom. Your entries should look like this: ns1.bluehost.com; ns2.bluehost.com.
You will then need to add the domain you bought (such as through GoDaddy) as an add-on domain to your Bluehost web hosting. You can do this by clicking on “Domains” when logged into your Bluehost web hosting account and then clicking on “assign.” Follow the steps and it is very easy!
If you need more help with this step, contact Bluehost Support. They are awesome, and very helpful.
I cant even tell you how many times that I called Bluehost. I would call back for each step that I needed help with, so that I wouldn't bug just one person and keep them on the phone for hours. they are so cool, and helpful, but I can only absorb one step at a time on the phone.
- When you are in your cPanel (you will receive a link to this in your welcome email from Bluehost), find the part that says “MOJO Marketplace.”
- Click the “One Click Install” button.
- Then, click on the WordPress icon on the next page located under “Blogs.”
- Click on the “Start” button. This will begin the installation.
- Once in the installation process, you will have to decide which domain you will want to install WordPress on. Click the drop down menu to the domain you plan on using.
- Now, you will see “Advanced Options.” This is where you choose your username and password for your WordPress website. You should choose something secure. Don’t use “Admin” as your username. This is popular with hackers. Instead, create a username that is a combination of symbols, letters, numbers; don't use your name. You will want to check “Automatically create a new database for this installation” as well, unless you already have a different database (if you don’t know, then you probably do not).
- Click “Install Now.”
- Remember to save your username and password
Congratulations! You have just set up your first Wordpress Blog. Now the fun stuff begins: Writing amazing money making content, and a cool design that shows off your stuff.

Some More Quick Tips:
- You will get an wordpress email with login information. Save this information separately. Create a folder with WP login info. This email will include your WordPress login URL (your URL is separate from everyone else’s and it’s the only way you can access your WordPress account), your username, and your password.
- The first thing you’ll want to do is add a post (and change any default post, if there is one). Go to your left-hand, vertical menu and select “Posts>>All Posts”. The default "Hello World” post will open up. Replace the Title with your own and the text with your own.
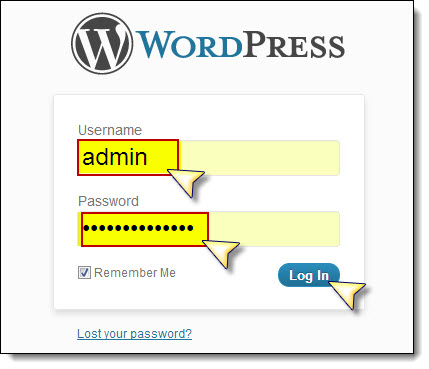
- Login to WordPress with your username and password
That's really it, now you know how to login to the WordPress Dashboard where you can install themes, plugins, and write blog posts among other things.
I highly recommend them. They are the oldest and best in their field. I have been with them for over 11 years and love their customer service. No one does it better.
- “Visit” your post or site, and make sure everything looks the way you’d like it to.
There is, of course, a lot more to learn – such as pre-scheduling posts, adding more plugins, tweaking your CSS, adding audio or video plugins, and more – but get comfortable with blogging and make some posts first, rather than trying to jump from WordPress beginner to expert all in one day.
Happy Blogging!
Here are more blogging-related posts you really should take a look at after you have learned how to start a WordPress blog:
- Beauty Blog Business
- How Do I Get Clients Fast
- Building Your Customer Email List
- Learn More about your Business Entrepreneur Blog
Have a Great Tip About Success With Your Own Wordpress Beauty Blog?
